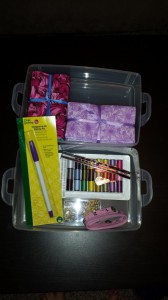
Earlier, I mentioned that I wanted to learn English Paper Piecing and that I would be using this blog as a way to assure that I don’t leave it as a work in progress. Well, guess what? I spent a lot of time yesterday in Joann’s Fabrics (a crafter’s toy store!) to purchase the necessary materials.
Supplies
I was totally amazed at the number of supplies needed for a project such as this. True not all are needed right away, but I wanted to get them all in advance. What did I get?
Additional fabric – I had the basics, but needed some for lining, additional fabric for the piecing, the binding and back of the pillow
Pins – straight and curved safety pins (I never even knew these existed)
Basting spray – to prevent needing to baste the entire cover
Batting
Needles – a set of in betweens so I can determine which ones will work best for me
Button – needed to close the pillow once the form is in it
Pillow form
Still to purchase or create
I still need to get one additional item, which Joann’s didn’t carry: the templates to use. I can make my own, but since I am just learning, and am not totally comfortable cutting out 60 templates, I am going to purchase them. Once I get them and use them for this project, I will do a review in the Products section! I promise!
Next Steps
1. Order templates for hexagon shape I am using
2. Wash all fabric purchased
3. Cut out the squares and assure I have enough paper clips
4. Create my travel kit, since I will be taking this project on the road with me
Follow along
Please continue to follow along with me as I document each step of this process. I will be taking pictures of my progress and hope to have this completed as quickly as possible. I will have a lot of downtime in about 2 weeks as my daughter is competing in a pageant and there is a lot of time when I will have nothing else to do. Thus, I will be working on this pillow! Keep an eye out for these pictures over the next several weeks!


Great project Alison, can’t wait for what’s next! 🙂